According to ASTM E1316, a flaw is defined as ‘‘an imperfection or discontinuity that may be detectable by non-destructive testing and is not necessarily rejectable.” A flaw can be naturally occurring or can be introduced by material processing. It can also be defined as a deviation in appearance, shape, dimension, macro-structure/micro-structure when compared with the specifications given in the technical standards.

With these multiple definitions and generation possibilities for flaw detection, we should also consider when it comes to the understanding of non-destructive testing capabilities for the detection of flaws. Identifying flaws in a metallic structure seems strenuous. The non-destructive testing method is most appropriate for detecting a specific flaw type. Where quality is a concern, machine vision allows the manufacturer to find corrosion, cracks, gaps, pits, and other unacceptable flaws via non-destructive methods.
Evaluating different techniques for flaw detection:
Visual Inspection Method involves visual observation of the surface of a test object to evaluate the presence of surface discontinuities such as corrosion, misalignment of parts, physical damage and cracks.
Liquid Penetrant Testing called PT or LPT, this method can be applied to the surface inspection of almost every product and material regardless of their properties. LPT is based on the simple rule called capillary phenomenon. The penetrant penetrates the narrow-gapped defect and the defect shall be fulfilled with the penetrant. Then the fulfilled penetrant shall be taken up from the defect to the surface by developing material and it spreads around the defect and on the surface.

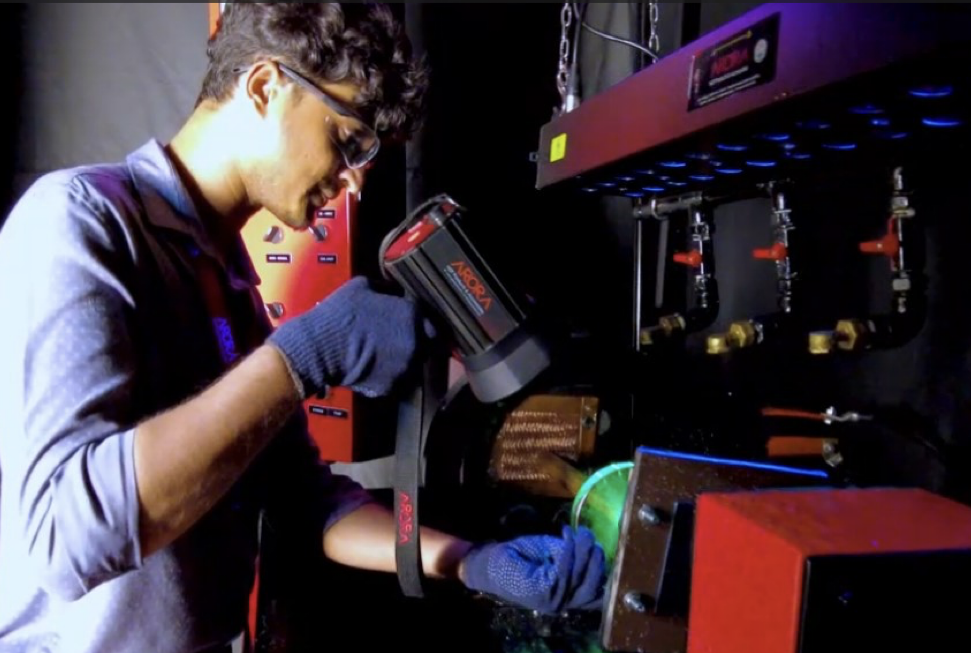
Magnetic Particle Testing (MPT) is used for the detection of ferromagnetic material, which involves putting the magnetic field into the part and applying finely divided ferromagnetic particles over the surface. Attracted particles by magnetic flux leakage reveal the location and shape of the discontinuities i.e., flaws.
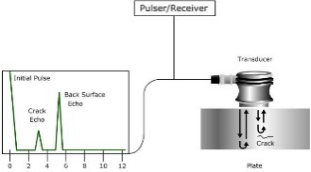
In Ultrasonic Testing (UT), sound waves through a pulsing device travel through the object being inspected and any irregularities produce a reflective effect which is gathered by the receiver & interpreted into visual data.

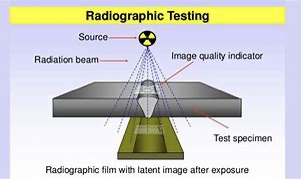
Radiographic Testing (RT) is an NDT method that uses either x-rays or gamma rays to examine the internal structure of manufactured components identifying any flaws or defects.

Our current offering includes a wide range of products depending on the inspection material, type of flaw and size of the inspection areas. Below mentioned are a few of the products classified with respect to the testing methods.
- LED UV Lamps & UV Meter
- Yokes, Power Packs, MPI Benches & Accessories
- Film Viewers & Optical Densitometer
- Ultrasonic Probes, Cables & Calibration Blocks
- Eddy Current Probes/Coils
- Ultrasonic Installed Sensors, Phased Array Equipment, Scanners, Probes & Accessories
- Eddy Current Equipment
- Radiography Systems for Tube-to-Tube Sheet Weld Inspection
- Sewer Inspection Cameras
- Radiation Resistant for Nuclear Power Plants
- Wire Rope Testers, etc.
Automation & Robotics: We offer online/offline NDT Systems under the supervision of our principals who are world leaders in their respective fields. The process starts with identifying the appropriate NDT techniques, codes, inspection speed, customer requirements and budget, etc. Based on the above information, our objective is to offer a robust and cost-effective system. One of the biggest challenges in today’s world is technology obsolescence. Apart from selling new systems, we also support our customers with retrofits/upgrading to the latest hardware & software either in NDT or in Automation.

Author
Mr. Mukesh Arora (Director & CEO)
Arora Technologies (P) Limited.
Ms. Shreya Karade (Business Development Engineer)
Arora Technologies (P) Limited.
E: [email protected] | W: www.arorandt.com


Bhaskar Sen
November 22, 2023 at 8:12 amGOOD RECOLLECTING RETROFIT WHRB 18.5+ 7.5 MW TISCO JODA SPONGE IRON PLANT IN 2006-8